

Home / Guides / Surface swabbing
FOOD MICROBIOLOGY · SURFACE SWABBING · CLEANING VERIFICATION
Key facts
- R638 limit not more than 100 viable microorganisms per cm2 on a cleaned food contact surface (reg 6(4)(b)(i), SANS 5763)
- Two programmes cleaning verification counts after the clean; pathogen sponges about 3 hours into production
- Sample area over 100 cm2 and preferably 1 000 cm2 for detection; ISO 18593:2018 points to 1 000 to 3 000 cm2
- Broth to sanitiser D/E for quats, chlorine, iodine, phenolics, aldehydes and peroxides; HiCap for peroxides; Letheen limited
- Letheen capacity about a quarter of D/E and HiCap against quats; 1 ml inadequate above about 25 cm2
- Cold chain chilled, not frozen, at once; the superseded ISO 18593:2004 gave 1 to 4 degrees, 4 hours, analysis within 24 hours
- Laboratory ISO 11290-1 Listeria, ISO 6579-1 Salmonella, ISO 21528-2 Enterobacteriaceae, ISO 4833-1 plate count on the schedule
- Field blank one unopened sponge carried through the round, every round
Build the programme, not the sampling list
Practical Pathogen Environmental Monitoring (EMP) and Surface Swabbing is the advanced ASC course that takes you from this guide to a scored, exportable environmental monitoring risk assessment for your own plant: 6 modules, 25 lessons, 15 narrated videos, the EMP Programme Builder and a free EMP package. 9 hours, R1 750, marked in minutes.
See the courseTry the free builderAdvanced level. No factory needed: three case sites carry every activity.Two swabs, two questions, two records
The cleaning verification swab asks whether last night’s clean worked. It is a template of 100 square centimetres on a food contact surface after cleaning and before production, counted for aerobic plate count or Enterobacteriaceae, and read against the only microbiological limit South African law puts on a surface: not more than 100 viable microorganisms per square centimetre, regulation 6(4)(b)(i) of R638, by SANS 5763. The pathogen sponge asks a different question: is a niche seeding the line. It is as big an area as the surface allows, taken about three hours into production when the niche has had time to shed, and it looks for Listeria spp. Both can be right on the same belt on the same day. Keep them as two programmes with two records, and never let a good plate count stand in for a Listeria result.
A result over 100 per cm2 means the surface may not be used until it is re-cleaned and re-verified. Using it would contravene regulation 6(4)(b)(i).Regulation R638 of 2018, regulation 6(4)(b)(i)
Sponge or swab, and how big an area?
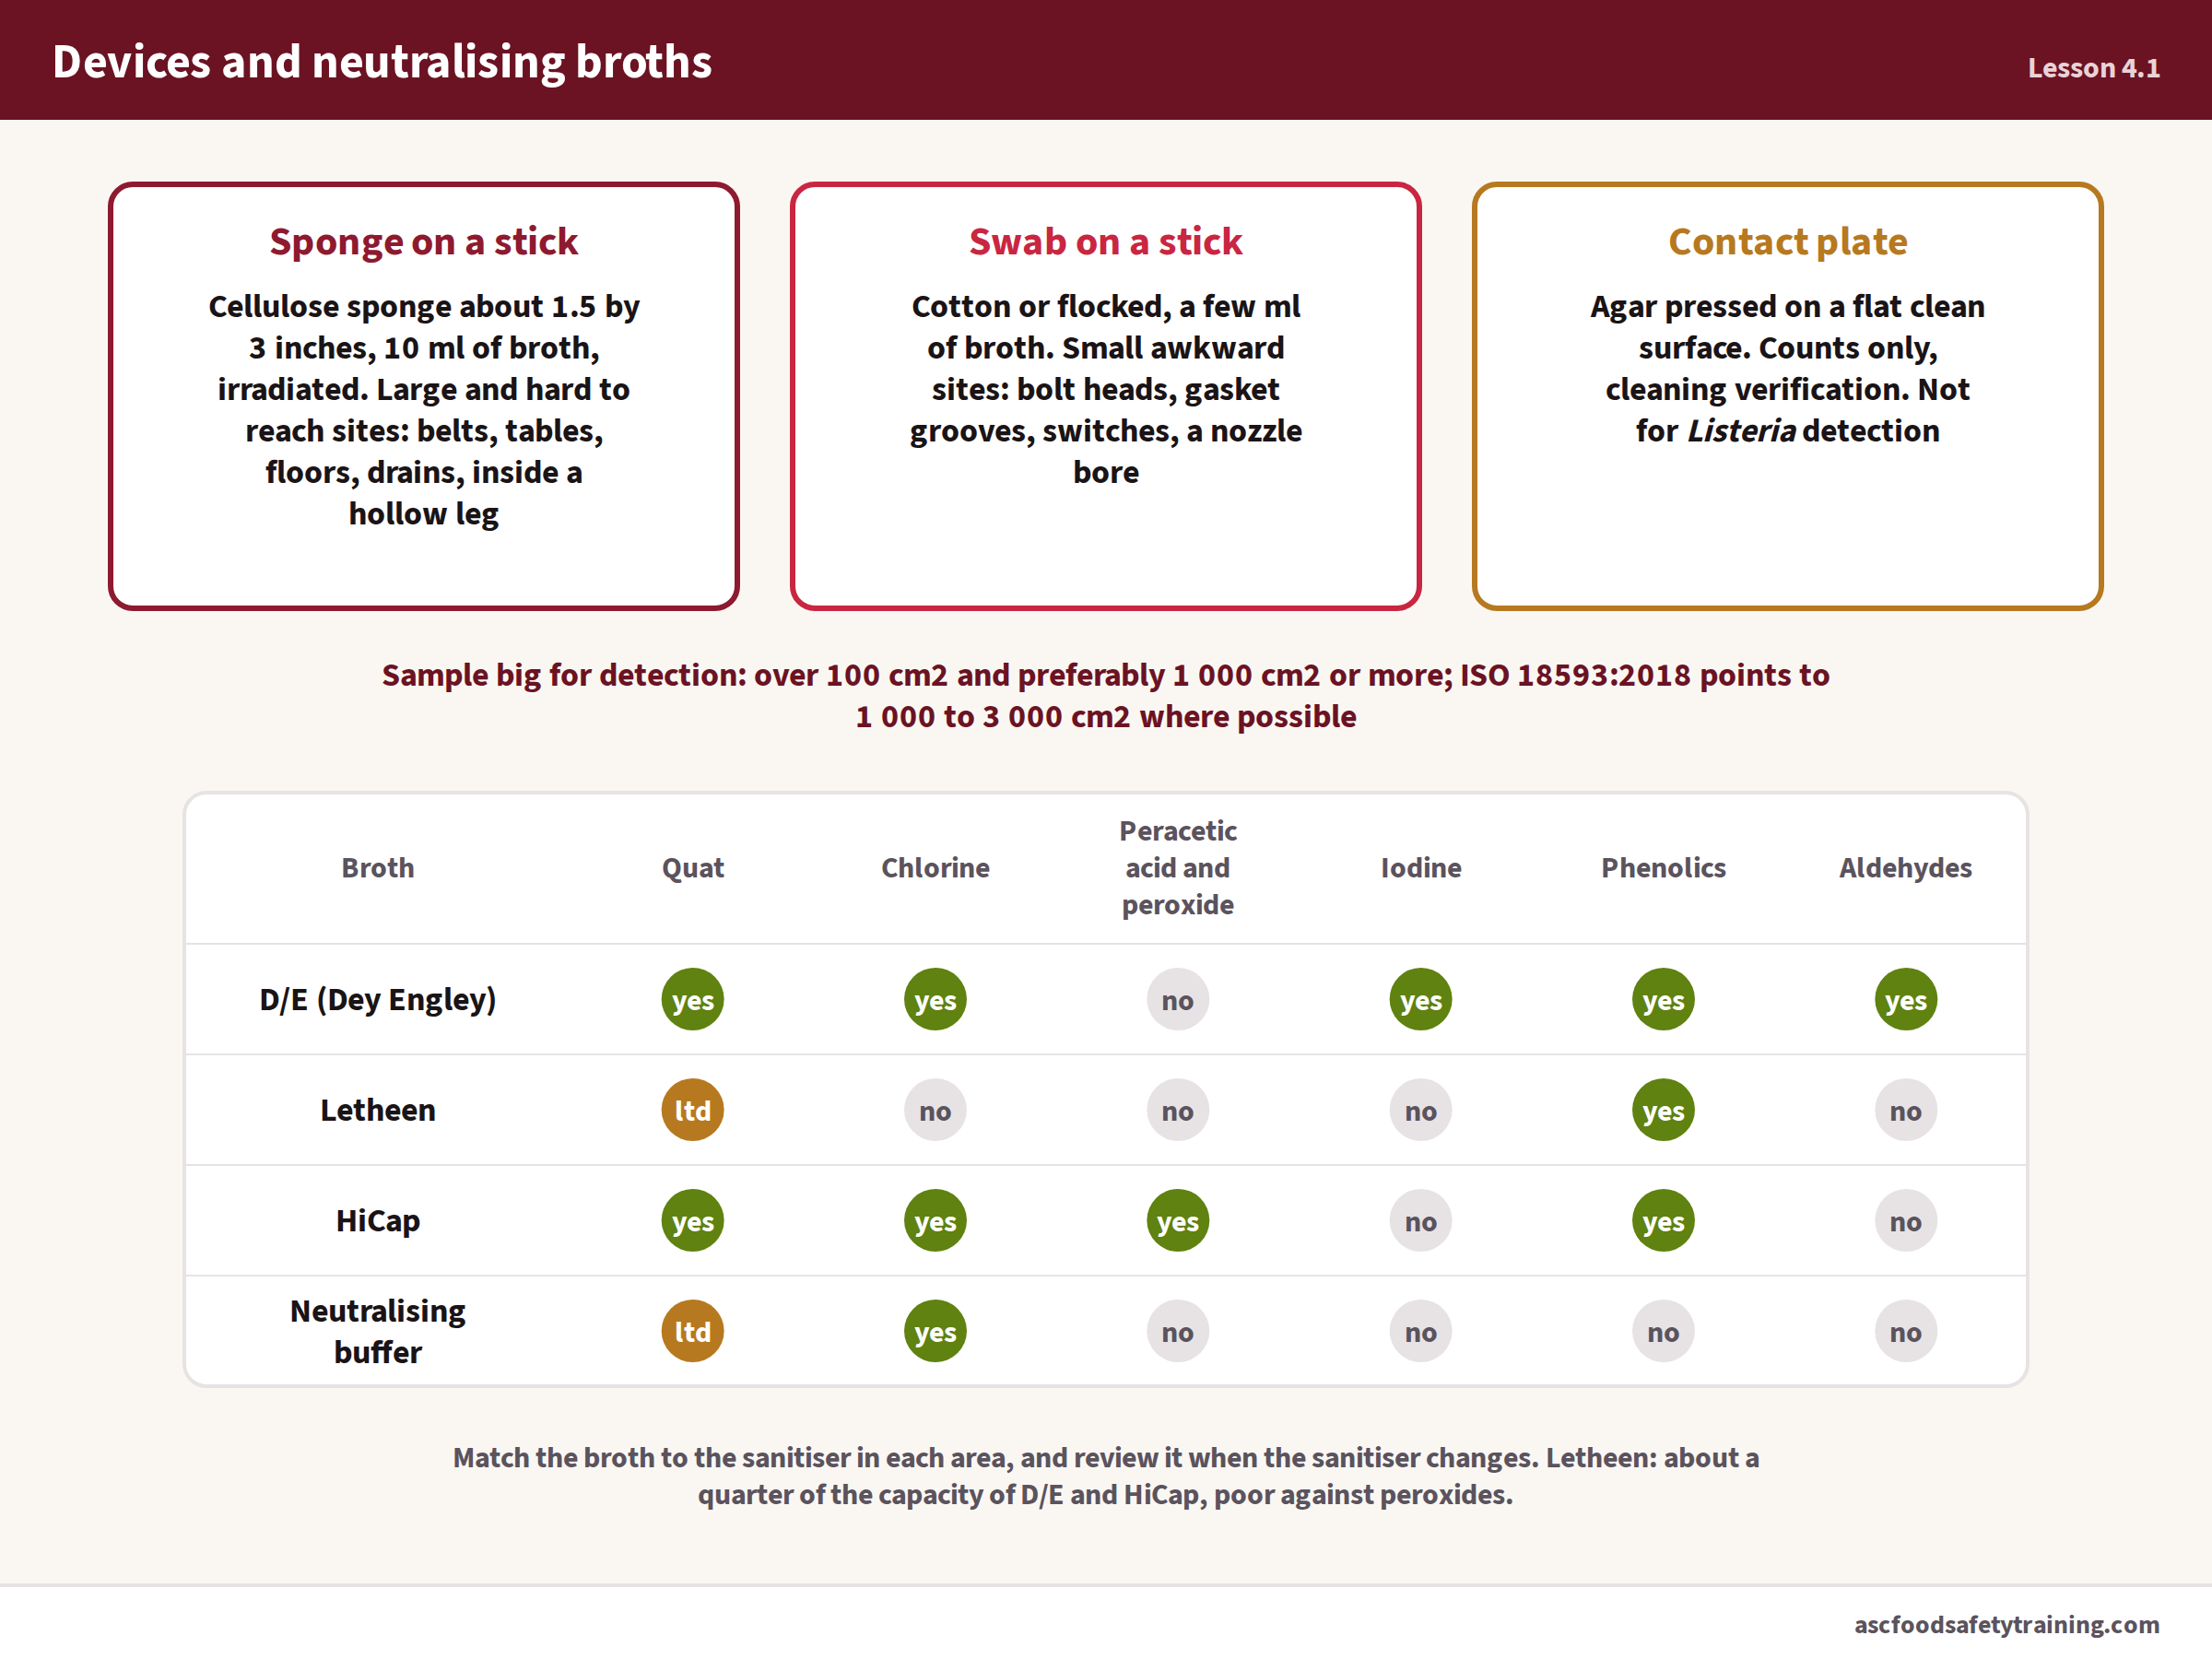
A cellulose sponge on a stick with about 10 ml of broth is the device for large and hard to reach surfaces: belts, floors, drains, the inside of a hollow leg. A swab is for a bolt head, a gasket groove or a nozzle bore. A contact plate is for counts on a flat, clean surface only, never for Listeria detection. Sample big when you are looking for a pathogen: the 3M handbook says over 100 square centimetres and preferably 1 000 or more, and ISO 18593:2018 points to 1 000 to 3 000 square centimetres where the surface allows. The 100 square centimetre template belongs to cleaning verification, where the area has to be known to calculate a count.
Which broth? Match it to the sanitiser in each area
The broth in the sponge bag does three jobs: it wets the sponge so it picks cells up, it neutralises the sanitiser that came off the surface so the sanitiser does not go on killing cells in the bag, and it keeps stressed cells alive to the laboratory. Which broth depends on which sanitiser your plant uses, and most plants use more than one.
| Broth | Neutralises | Watch out for |
|---|---|---|
| Dey Engley (D/E) neutralising broth | Quats, chlorine, iodine, phenolics, mercurials, formaldehyde and glutaraldehyde, and the peroxides, hydrogen peroxide and peracetic acid (3M handbook Table 5; HiCap white paper) | The default for a wet plant; an enrichment broth, so re-sanitise the surface after sampling |
| HiCap neutralising broth | Quats, peroxide and peracetic acid, chlorine, phenolics, alcohols and acid sanitisers (manufacturer’s claims) | The high capacity choice where sanitiser residue is heavy |
| Letheen broth | Quats, chlorine and iodine on the handbook table, with about a quarter of the capacity of D/E and HiCap against quats; poor against peroxides | 1 ml is inadequate above about 25 cm2; not accepted by the course for quat or chlorine surfaces |
| Neutralising buffer | Chlorine and iodine | No cover for quats, peroxides or peracetic acid |
The silent failure is a Letheen or a neutralising buffer sponge on a peracetic acid line. It has been producing suspect negatives since the day the sanitiser changed, and nobody knows, because a negative looks like good news. Write the sanitiser and the broth side by side in the procedure, area by area, and make a change of sanitiser a trigger to review the sponge specification. The EMP Programme Builder in the course checks every area for that mismatch and will not pass its review gate until it is cleared.
The ten step sampling round
- Before the floor: print the day’s list, pre label every bag with site code, date, time and initials in a marker that survives condensation, check the broth and the dates, pack the cool box with frozen packs and take spare gloves.
- Enter by the area’s own hygiene rule. You are a vector too.
- Fresh gloves for every sample, every time.
- Open the bag by the tear line without touching the inside, wet the sponge by squeezing the bag, lift it out without touching the rim.
- Two directions: firm overlapping strokes across the whole area horizontally, flip to a clean face, repeat vertically; into the corner, under the lip, along the weld.
- Bag it, snap the handle at the thumb stop so the part you held stays outside, seal, check the label, press out the air, into the cool box.
- Wipe and re-sanitise the sampled Zone 1 or 2 surface once the sponge is bagged, because D/E and Letheen are enrichment broths and a film of broth on a belt is a growth substrate.
- Log it as you go: site code, time, zone, target, and what you saw. The observations feed the root cause later.
- Clean to dirty: Zone 1 to Zone 4, and within a zone from the cleanest surface to the drain. Drains last. Never composite Zone 1 or an investigation site.
- Carry an unopened sponge through the round as a field blank, and change gloves before you touch the next bag.
From the site to the laboratory
The sample is alive and it is evidence. Chilled, not frozen, at once: frozen packs in the box before the round starts and the samples never in direct contact with them, because a frozen sponge is a dead sponge. ISO 18593:2018 specifies chilled transport and analysis as soon as possible; the superseded 2004 edition put figures on it, into a cool box at 1 to 4 degrees Celsius within four hours and analysis within 24 hours of sampling, and many laboratories still use them. Write your own laboratory’s accredited method figures into the procedure. The 24 hours runs from sampling, not from dispatch: a sponge taken at 11h00 in Gqeberha and delivered to Johannesburg at 11h00 the next day is 24 hours old on arrival, so same day set up is the only way to stay inside the figure.
Sign every handover, sampler to driver to laboratory reception, with a name, a signature, a time and a temperature, and make sure your site code comes back on the laboratory report against the laboratory number. Then read the schedule of accreditation. FSSC 22000 Version 7 clause 2.5.1 requires laboratory analysis to be done by a competent laboratory, which in South Africa usually means SANAS accreditation to ISO/IEC 17025 with the methods on the schedule: ISO 11290-1 for Listeria detection, ISO 6579-1 for Salmonella, ISO 21528-2 for Enterobacteriaceae, ISO 4833-1 for the plate count. A laboratory accredited for water is not accredited for Listeria in an environmental sponge. Ask, in the contract, for isolates to be kept for two years and typed on request; it is the only way to prove later that March and August were the same strain.
Where this guide stops and the course starts
A good sample is the middle of the programme. Before it come the zones, the plant walk that finds the niches, the choice of pathogen, index and indicator organisms, and the 5 x 5 risk rating that decides which sites are weekly and which take turns inside a swab budget. After it come the baselines and action levels, the trend record clause 2.5.7 (c) asks for, the first hour after a positive, the star burst, seek and destroy, and a root cause that stops at a design or purchasing decision. Practical Pathogen Environmental Monitoring (EMP) and Surface Swabbing carries all of it, module by module, and ends in the workshop where you build the whole programme in the EMP Programme Builder and export it as your own environmental monitoring risk assessment in the ASC RA19 structure. Nine hours, advanced, marked in minutes, and every figure in it names its source.
What the course leaves you with
- The swab log sheet (Word and PDF) with the observation column that feeds the root cause
- The broth to sanitiser check built into the EMP Programme Builder
- The ten step round taught in a narrated practical application video, with the reason for every step
- The chain of custody and accreditation checklist, and the R638 cleaning verification programme in its own lane
- Your generated environmental monitoring risk assessment, the schedule matrix and the vectoring flowchart
Questions people ask
What is the legal limit for a swab on a cleaned surface in South Africa?
Regulation R638 of 2018, regulation 6(4)(b)(i): a cleaned food contact surface must not contain more than 100 viable microorganisms per square centimetre before food touches it, tested by SANS 5763. It is a cleaning verification limit, not a Listeria limit.
Sponge or swab for Listeria?
A sponge with about 10 ml of neutralising broth for belts, floors, drains and large or hard to reach surfaces, sampling 1 000 square centimetres or more where the surface allows; a swab for a bolt head, a gasket groove or a nozzle bore. Never a contact plate for detection.
Which neutralising broth for peracetic acid?
A peroxide capable broth: Dey Engley (D/E) or HiCap, on the 3M handbook table and the HiCap white paper. Letheen and neutralising buffer do not cover peroxides, and a Letheen sponge on a peracetic acid line produces suspect negatives.
How long can a sponge wait before the laboratory sets it up?
ISO 18593:2018 says chilled and as soon as possible. The superseded 2004 edition gave 1 to 4 degrees Celsius, into the cool box within four hours and analysis within 24 hours of sampling, and many laboratories still use those figures. Take the figure from your laboratory’s accredited method and count the 24 hours from sampling.
Do I have to re-sanitise a surface after sponging it?
Yes on Zone 1 and Zone 2 surfaces. D/E and Letheen are enrichment broths, and a film of broth left on a belt three hours into production is a growth substrate. Wipe and re-sanitise with the area’s sanitiser once the sponge is bagged.
Enrol in the EMP course
Advanced level, 9 hours, self paced, lifetime access, R1 750 in rand through PayFast. You come out with your own environmental monitoring risk assessment in the ASC RA19 structure, the schedule matrix, the swab log, the vectoring flowchart and a certificate of achievement.
Enrol nowPlay Zone it first